How to replace laptop backlight lamp (CCFL)
In this guide I will disassemble a laptop LCD screen in order to remove and replace the backlight lamp (CCFL).
Replacing the backlight lamp is not an easy task even for experienced technicians. If you do something wrong you will permanently damage the LCD screen and have to buy a new one. Proceed on your own risk and do not blame me.
Replacing the backlight lamp is not an easy task even for experienced technicians. If you do something wrong you will permanently damage the LCD screen and have to buy a new one. Proceed on your own risk and do not blame me.
Some recommendations before you start:
1. Work in a clean room. You don’t want dust and lint inside your LCD screen.
2. Make notes, so you know how to assemble your screen back.
3. Take pictures.
4. Before you remove something, take a closer look at the part and memorize how it is assembled.
5. When you are assembling the screen, remove dust and lint with compressed air. Do not use cloth.
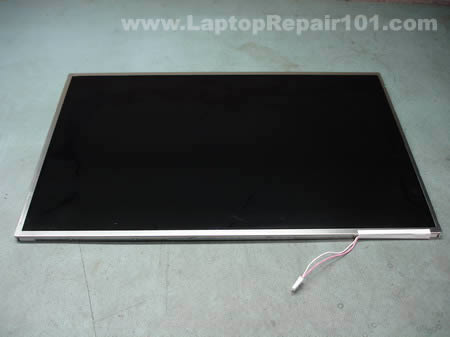
The backlight lamp (CCFL) is located inside the LCD screen, so we are going to take it apart. In this article I’m not going to explain how to remove LCD from a laptop, it’s been covered before.
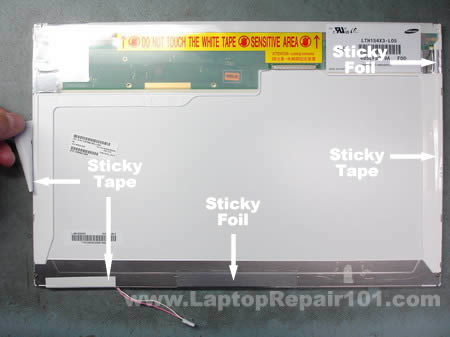
Remove sticky tape and foil from the back of the screen and glue it somewhere so you can reuse it later, when you assemble the screen.
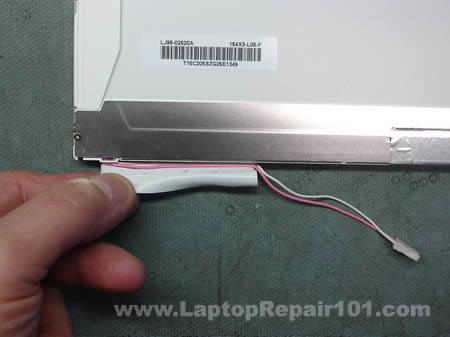
Removing tape from the backlight cables.
On my screen the green circuit board was glued to the plastic frame with a double sided tape. Carefully unglue the circuit board. Be very careful, do not flex or bend the circuit board.

The circuit board has been unglued.

Place the LCD screen on the side and start removing the metal frame witch secures the LCD to the plastic frame. There will be many latches on all sides of the frame, you can unlock them with a small screwdriver.
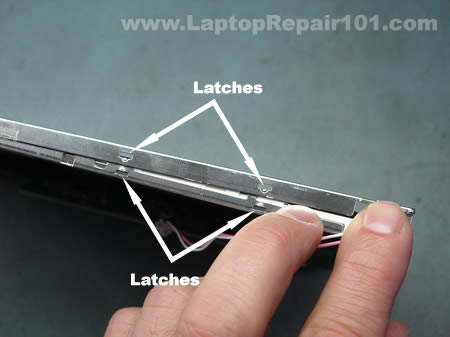
Continue separating the metal frame from the plastic base.
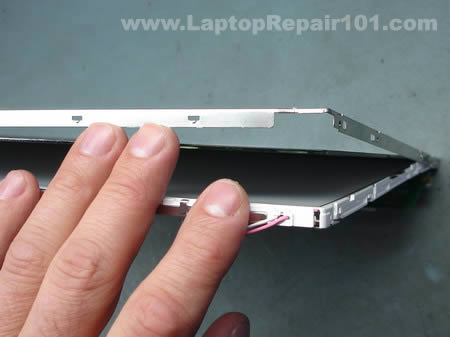
On the following picture you can see that frame, LCD with the circuit board and screen base have been separated. Be careful, do not touch internal components with your fingers. Handle all internal components by the sides.
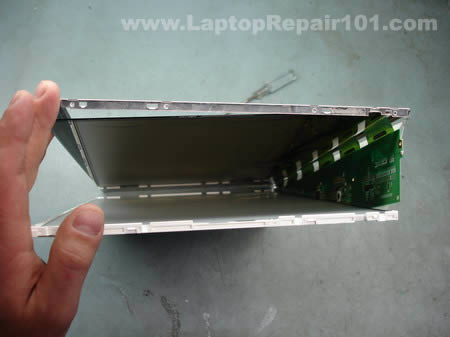
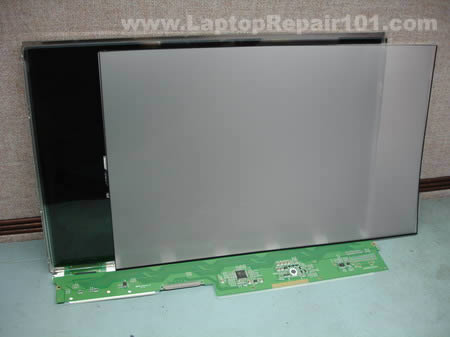
Place the metal frame and LCD with the circuit board aside. You’ll need them only when you assemble everything back together.

There will be a few transparent layers inside. Carefully remove them from the screen base. Do not separate the layers, just put them aside together.
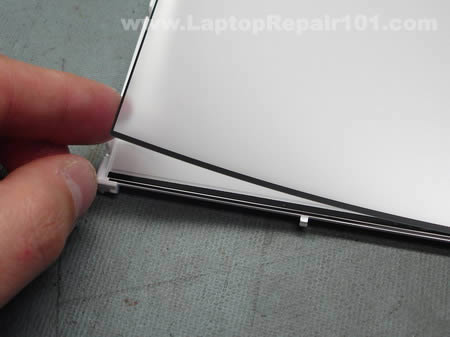
Keep everything organized, so you have no trouble assembling the screen.
Start removing the metal cover from the backlight lamp (CCFL).
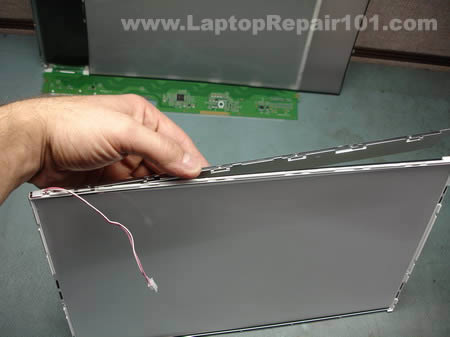
The backlight cover has been removed.
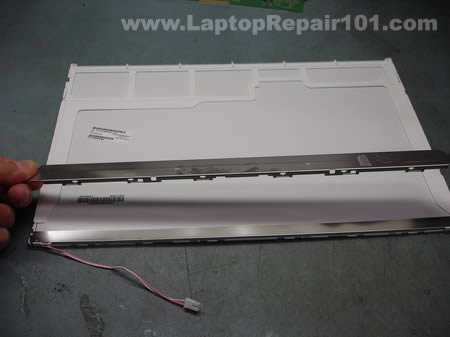
The backlight lamp (CCFL) cables are routed through small plastic hooks.
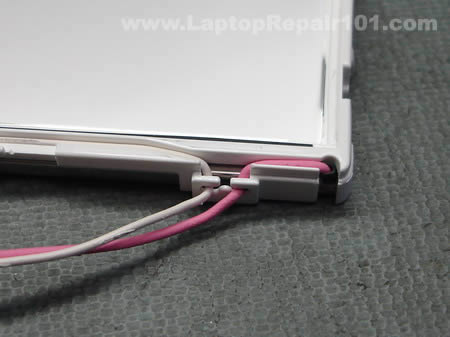
Unroute the backlight lamp cables.

Now probably the hardest part in this disassembly process – removing the backlight lamp and reflector. The backlight lamp is secured inside the reflector so you have to remove both and then separate them.
Before you remove the backlight lamp and reflector take a closer look how it’s assembled and mounted to the screen base. Fitting the backlight and reflector back in place could be a very challenging task.
Before you remove the backlight lamp and reflector take a closer look how it’s assembled and mounted to the screen base. Fitting the backlight and reflector back in place could be a very challenging task.
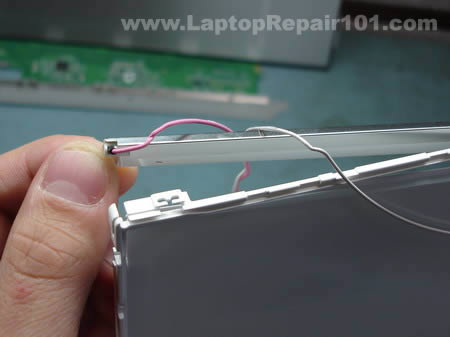
The reflector is glued to the screen base with a double sided tape.
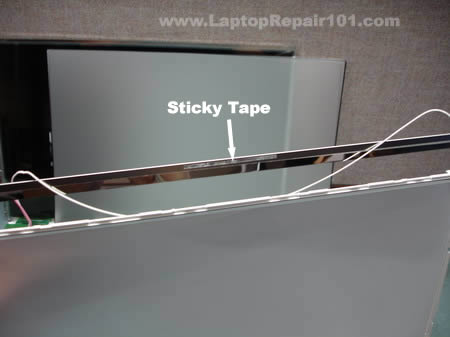
After the reflector has been unattached from the screen base, you can start removing the backlight lamp. As you see on the picture, I marked the left side of the reflector with a red dot so I know where the red cable goes when I assemble everything back together.
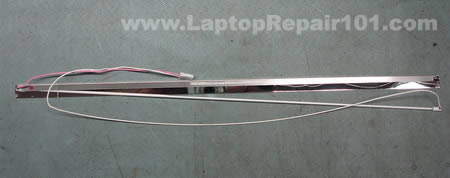
The backlight lamp (CCFL) has been removed from the reflector.
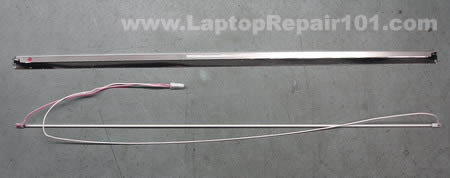
In order to access the backlight lamp leads you’ll have to remove the rubber caps from both side of the lamp. I’m not sure if you can touch the backlight lamp with your fingers, so I would use rubber gloves.
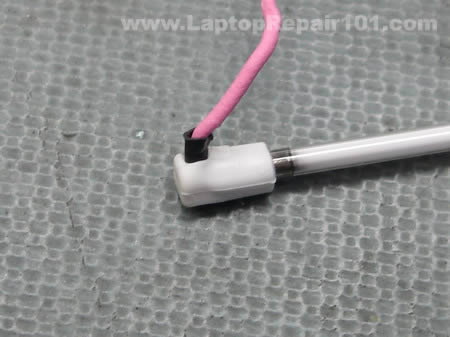
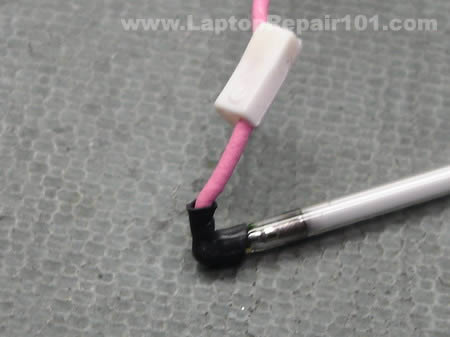
Cabled on both sides of the backlight lamp are soldered to the backlight leads. In order to access the leads you’ll have to remove the black insulator on both side of the lamp.
Unsolder both cables from the old backlight lamp and solder them to a new one.
Unsolder both cables from the old backlight lamp and solder them to a new one.
You can test the new backlight lamp (CCFL) before you install it back into the screen. Connect the backlight lamp into the inverter board and turn on the laptop. The backlight lamp should light up.
From my experience, on some laptops the backlight lamp will not light up until the video cable is connected to the LCD screen. In this case you’ll have to assemble the LCD screen and then test it.
From my experience, on some laptops the backlight lamp will not light up until the video cable is connected to the LCD screen. In this case you’ll have to assemble the LCD screen and then test it.
You can search for a new CCFL backlight lamp here.

No comments:
Post a Comment