Monday 29 October 2012

Repaired My Notebook LCD


How I took apart and repaired my notebook LCD


screen with water damage
Yesterday took apart and repaired my notebook LCD screen with water damage. The screen itself was working just fine but it had two different problems.
- previous owner spilled water on the laptop. Somehow the water got inside the LCD screen and left stains inside the screen. The water marks were very noticeable on a white background and it was very irritating.
- the screen also had dust and lint inside also very noticeable on a white background. I have no idea how it got in there but I decided to clean it up too.
To fix both problems I had to open up the LCD screen. This was my first experience on opening a notebook screen. I was pretty confident because I didn’t really care if I break the screen, I just wanted to know if it’s possible to fix it.
Warning: the LCD screen can be easily damaged if you open it up. If you do something wrong the screen might become completely unusable and you’ll have to buy a new screen. It’s very expensive. Think twice before you decide opening the screen. Continue at your own risk.
Here’s my Dell Latitude D610 notebook with water damaged screen I’m going to take apart.
First of all remove the battery from the notebook.
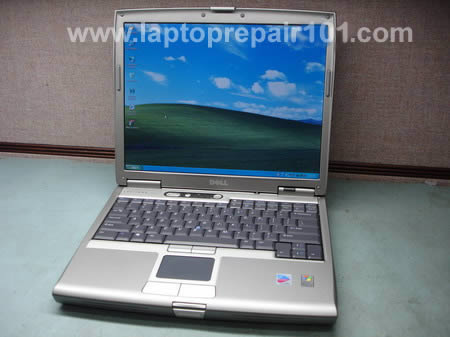
Laptop screen repair
Lift up rubber screw seals and remove all screws.
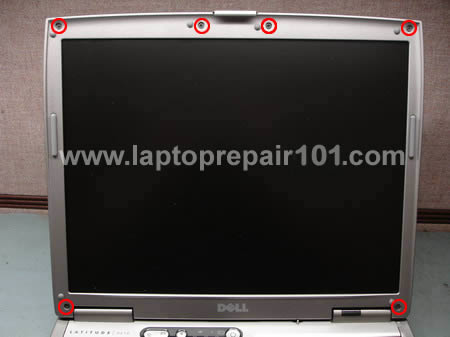
Remove LCD bezel
Carefully separate the screen bezel from the LCD cover and remove the bezel.
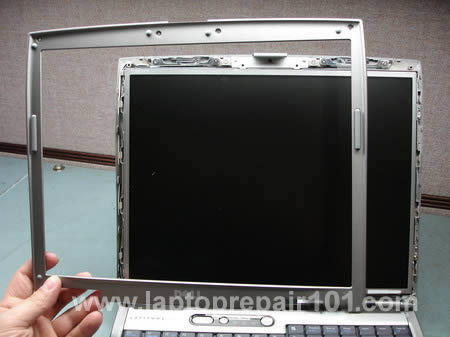
Open notebook display
Remove two screws from the front and two screws from both sides.
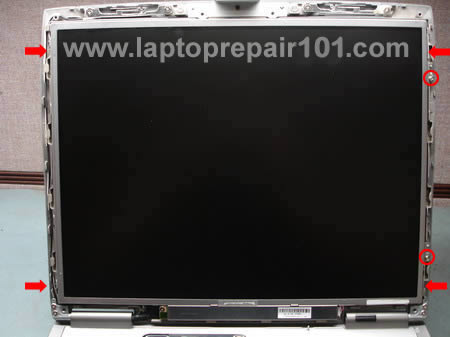
Remove LCD screen
Carefully remove the LCD screen from the cover and place it on the notebook base. Disconnect the video cable and the inverter board cable.
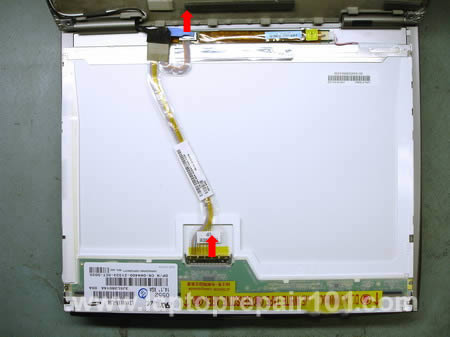
Disconnect LCD cables
On this model the inverter board is attached to the screen with two screws. Remove both screws, disconnect the screen cable and remove the inverter board.
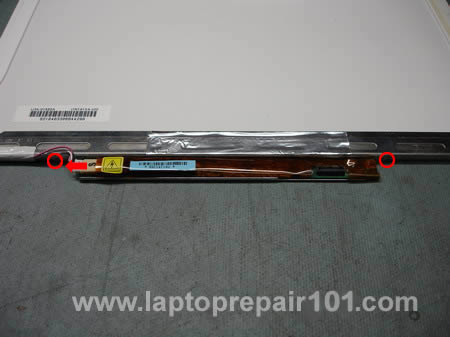
Remove screen inverter
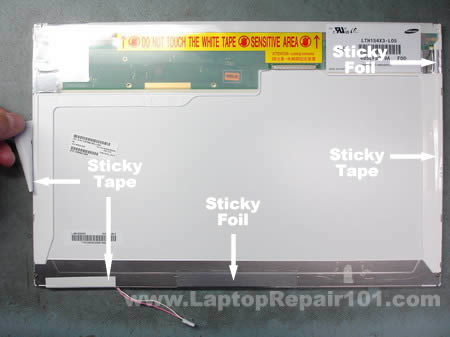
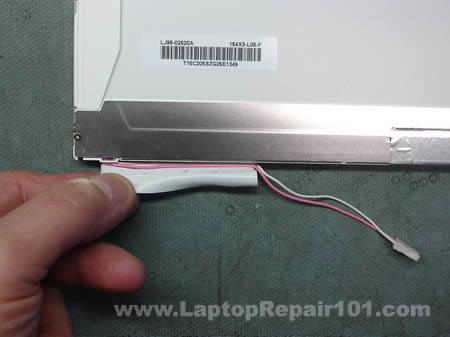
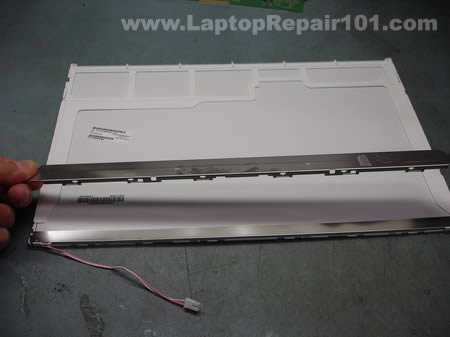
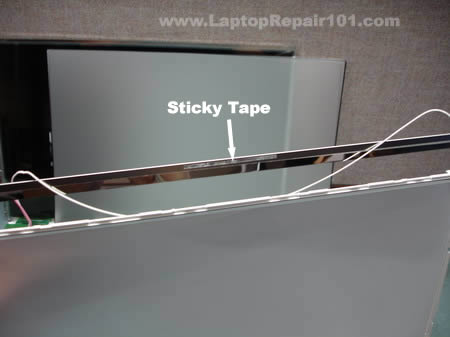
Carefully peel off sticky tape and foil and put it aside. You’ll have to put it back in place during the screen reassembly.
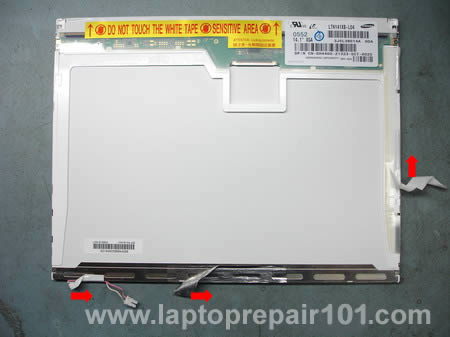
Remove securing tape
Remove two screws from both sides of the screen.
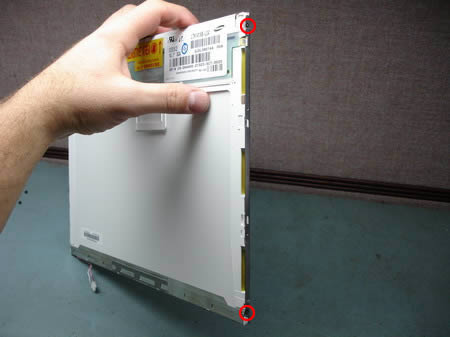
Remove screws from both sides
Carefully place the screen upside down on a flat surface. Carefully unglue the film that covers the circuit board and remove two screws from the board (top circles). I wasn’t really sure if I have to remove screws on the bottom, so I removed them just in case. Do not touch the circuit board with fingers.
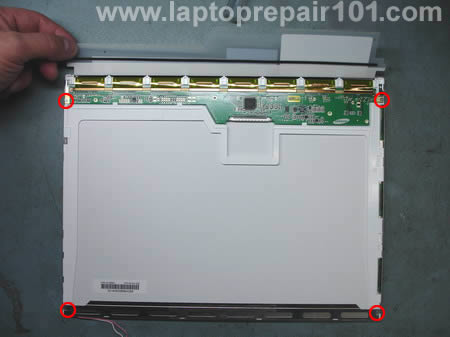
Open LCD screen
After both screws are removed you should be able to lift up the circuit board. Be careful, it’s still attached to the LCD.
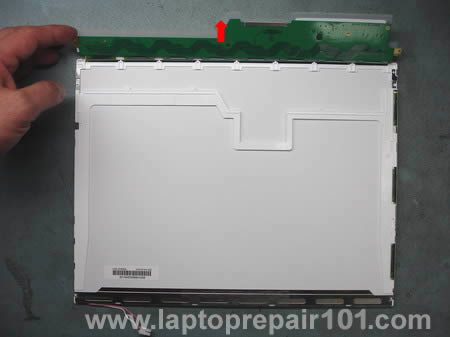
Lift up circuit board
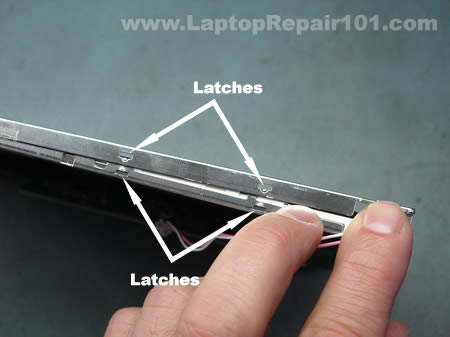
Start unsnapping the metal frame from the screen. There are a lot of latches on all sides of the screen. You can unlock them with nails or a small flat head screwdriver.
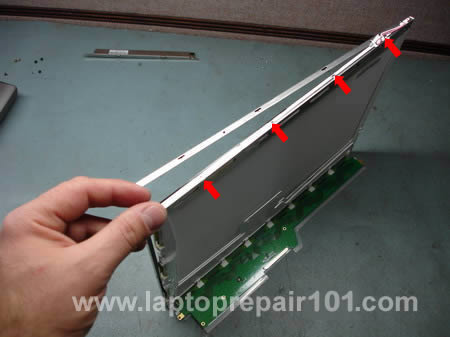
Unsnap LCD screen frame
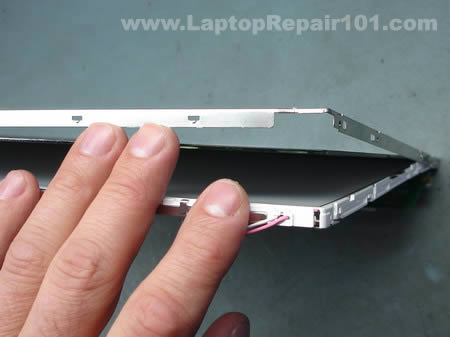
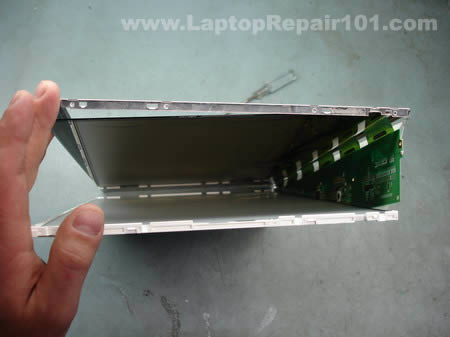
After all latches are opened you should be able to separate the screen into three pieces: metal frame, LCD and background (not sure about correct technical name).
If you have lint or dust inside the screen, probably you’ll find it between the LCD and the background. Do not touch LCD or background with your fingers. I was able to remove dust and lint up with a very soft cloth, barely touching the LCD and background surfaces.
After I split the screen I found that the background has a few some kind of optical layers (three transparent sheets) and in my case they were damaged by water. The water dried out and left stains between these optical layers.
In my case removing dust and lint wasn’t enough and I had to go further.
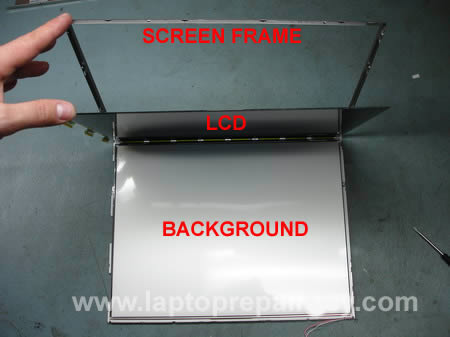
Split notebook screen
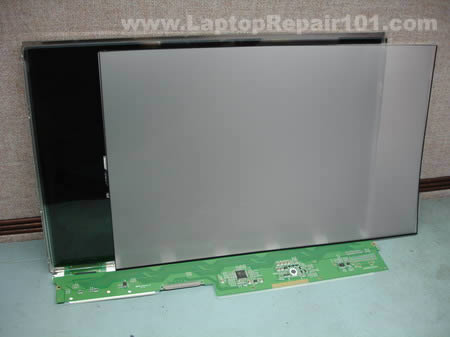
Very carefully separate the LCD with attached circuit board from the background.
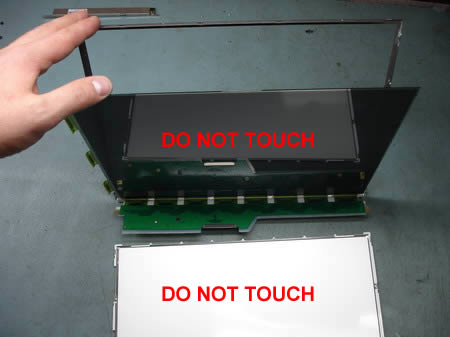
Separate LCD
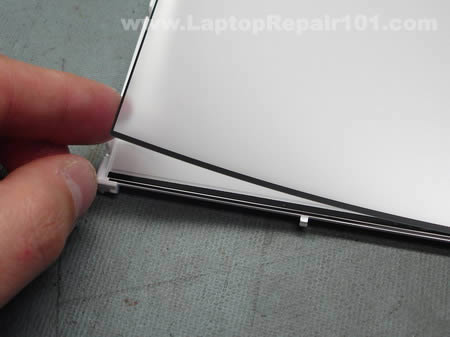
To remove damaged optical layers it’s necessary to remove metal locks on both sides of the screen. It’s like a small clip that keeps layers in place.
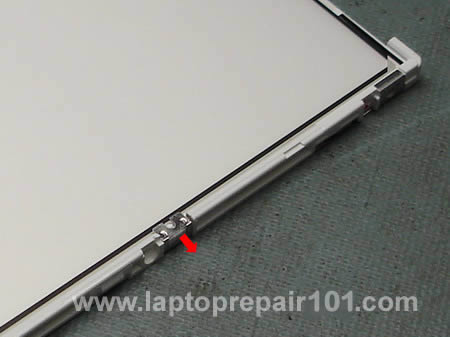
Remove screen locks
After I removed both clips, I was able to look between the layers. At first I tried to clean up the dried water marks with a soft cloth but it didn’t help. The stains were still visible and didn’t want to go away.
Fortunately I had another similar screen laying around, it had a cracked LCD. I decided to borrow the optical layers from the cracked screen and transfer them to my screen. I wasn’t sure if it’s going to work, but as I mentioned before I didn’t really care if I break the screen. It was just an experiment.
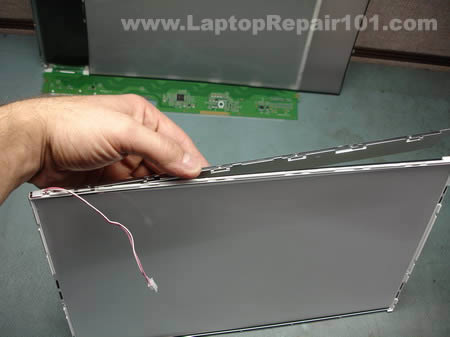
So I disassembled the cracked screen and carefully transferred the white background and all transparent layers to my screen.
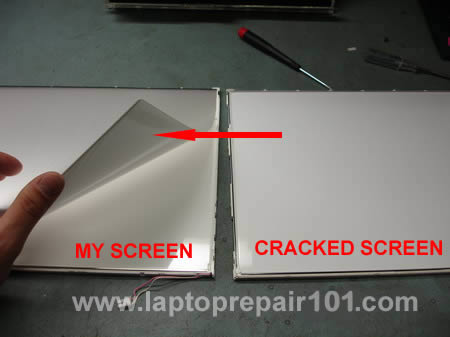
transfer damaged screen layers
After that I assembled my screen back removing dust and lint with a very soft cloth. Breathlessly connected my new screen to the notebook. Turned it on and…
That’s a miracle, it works!
No dust, no lint, no water mars inside the screen! It’s clear and the background is absolutely clean!
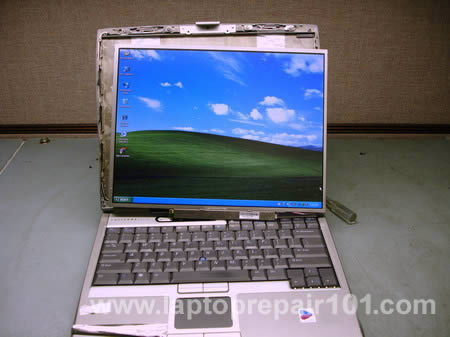
LCD screen works again
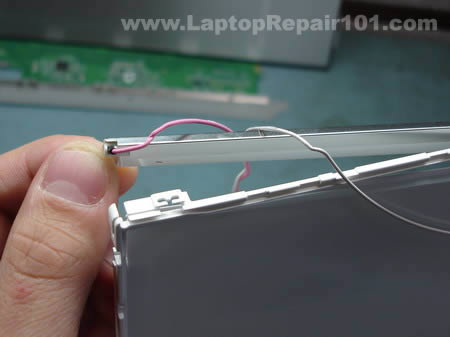
My donor screen had a cracked LCD but it had a good working backlight tube. The backlght tube is very fragile and it’s located inside a metal casing. I didn’t remove the backlight tube, I just broke off the entire metal casing from the plastic frame. I’m going to use this backlight tube for testing purposes.
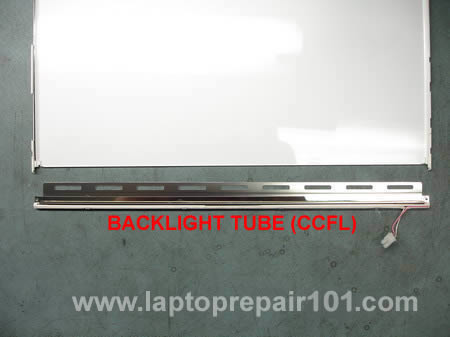
Test backlight bulb
If you fixing a Dell laptop yourself, probably you’ll need a service manual. Some Dell service manuals provide step-by-step laptop disassembly instructions.
Are you looking for a new screen? You can find very inexpensive brand new LCD screens just search for your laptop model.
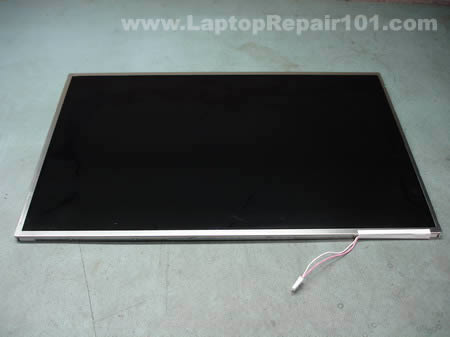
Replace Laptop Backlight Lamp


How to replace laptop backlight lamp (CCFL)

In this guide I will disassemble a laptop LCD screen in order to remove and replace the backlight lamp (CCFL).
Replacing the backlight lamp is not an easy task even for experienced technicians. If you do something wrong you will permanently damage the LCD screen and have to buy a new one. Proceed on your own risk and do not blame me. 
Some recommendations before you start:
1. Work in a clean room. You don’t want dust and lint inside your LCD screen.
2. Make notes, so you know how to assemble your screen back.
3. Take pictures.
4. Before you remove something, take a closer look at the part and memorize how it is assembled.
5. When you are assembling the screen, remove dust and lint with compressed air. Do not use cloth.
The backlight lamp (CCFL) is located inside the LCD screen, so we are going to take it apart. In this article I’m not going to explain how to remove LCD from a laptop, it’s been covered before.
LCD screen with bad backlight lamp
Remove sticky tape and foil from the back of the screen and glue it somewhere so you can reuse it later, when you assemble the screen.
Remove tape
Removing tape from the backlight cables.
Release backlight lamp cables
On my screen the green circuit board was glued to the plastic frame with a double sided tape. Carefully unglue the circuit board. Be very careful, do not flex or bend the circuit board.
LCD circuit board
The circuit board has been unglued.
Remove circuit board
Place the LCD screen on the side and start removing the metal frame witch secures the LCD to the plastic frame. There will be many latches on all sides of the frame, you can unlock them with a small screwdriver.
Open latches
Continue separating the metal frame from the plastic base.
Separate LCD frame
On the following picture you can see that frame, LCD with the circuit board and screen base have been separated. Be careful, do not touch internal components with your fingers. Handle all internal components by the sides.
Remove LCD
Place the metal frame and LCD with the circuit board aside. You’ll need them only when you assemble everything back together.
LCD
There will be a few transparent layers inside. Carefully remove them from the screen base. Do not separate the layers, just put them aside together.
Transparent layers inside screen
Keep everything organized, so you have no trouble assembling the screen.
Set aside
Start removing the metal cover from the backlight lamp (CCFL).
Remove backlight cover
The backlight cover has been removed.
Backlight lamp cover
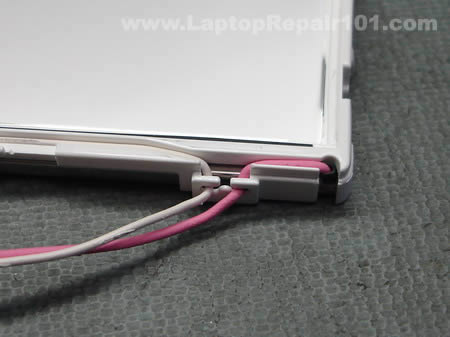
The backlight lamp (CCFL) cables are routed through small plastic hooks.
Backlight lamp cables
Unroute the backlight lamp cables.
Release backlight cables
Now probably the hardest part in this disassembly process – removing the backlight lamp and reflector. The backlight lamp is secured inside the reflector so you have to remove both and then separate them.
Before you remove the backlight lamp and reflector take a closer look how it’s assembled and mounted to the screen base. Fitting the backlight and reflector back in place could be a very challenging task.
Remove backlight lamp reflector
The reflector is glued to the screen base with a double sided tape.
Backlight reflector
After the reflector has been unattached from the screen base, you can start removing the backlight lamp. As you see on the picture, I marked the left side of the reflector with a red dot so I know where the red cable goes when I assemble everything back together.
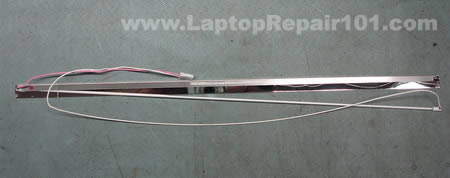
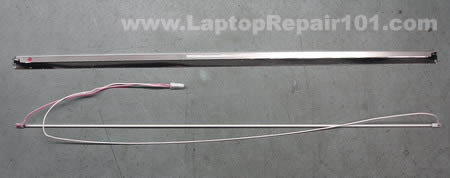
Remove backlight lamp
The backlight lamp (CCFL) has been removed from the reflector.
Backlight CCFL lamp
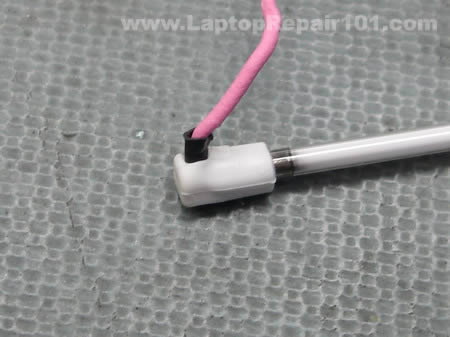
In order to access the backlight lamp leads you’ll have to remove the rubber caps from both side of the lamp. I’m not sure if you can touch the backlight lamp with your fingers, so I would use rubber gloves.
Remove cover
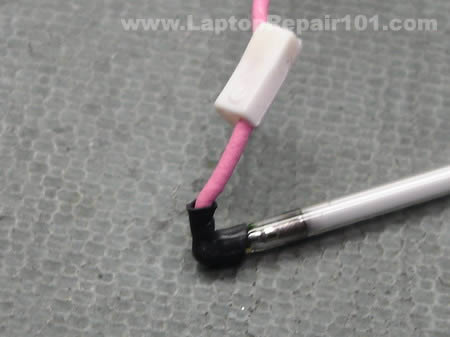
Cabled on both sides of the backlight lamp are soldered to the backlight leads. In order to access the leads you’ll have to remove the black insulator on both side of the lamp.
Unsolder both cables from the old backlight lamp and solder them to a new one.
Cable soldered to backlight lamp
You can test the new backlight lamp (CCFL) before you install it back into the screen. Connect the backlight lamp into the inverter board and turn on the laptop. The backlight lamp should light up.
From my experience, on some laptops the backlight lamp will not light up until the video cable is connected to the LCD screen. In this case you’ll have to assemble the LCD screen and then test it.
You can search for a new CCFL backlight lamp here.
Test backlight lamp

Sunday 28 October 2012

Toshiba Satellite model


Toshiba Satellite model M35X – fixing power


connector

Toshiba Satellite M35X model is known for it’s power connector problem. This issue has been covered on this blog a few times before in the following articles.
Toshiba Satellite M35X and Satellite A75 power jack and battery charge problem
Failed power jack workaround (guide for a Satellite A75 notebook similar to Satellite M35X)
Here’s another well written and documented guide submitted by Stephen Macuch. Thank you Stephen for the great pictures and very detailed instructions.
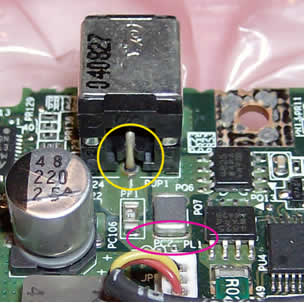
This is a view of the laptop power connector before the repair:
Power connector before repair
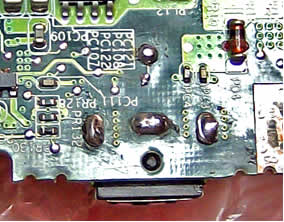
Inside the yellow circle is the main power connection from the connector to the board – note that you can see a dark circle completely around it, indicating that there is no solid metal connection.
Also note that it looks somewhat ‘burnt’ – this is indicative of sparking taking place. This connection carries 3 amps of current. The current then passes through the component labeled PF1 ( literally ‘Power Fuse 1’). It then is supposed to connect to this side of the part circled in red (‘PL1’) – but notice that flexing of the board as the connector was wiggled caused a crack you can see running horizontally under this end of this part.
Same view, after the repair:
Same view after repair
The green coating covering the metal leading up to the power connector was scraped off down to the bare copper of the board, in three places – the center pin, circled in yellow here, and the connector pins on both sides (see below). All were resoldered – on the top side of the board first, then touched up on the bottom (which is not where the primary electrical contact is made). The new broader, smoothly-tapered connection will be both physically stronger, and a better electrical connection.
Inside the red circle, you can see this was done for other part (PL1), as well.
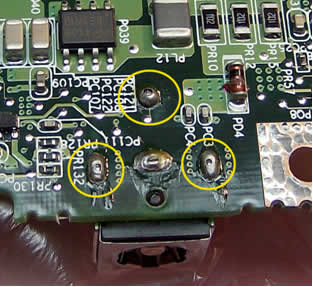
Bottom view of connector, before the repair:
Bottom view of connector before repair
Again note that inside the circled areas, you can see dark circles where there should be solid metal, indicating that the original physical connection has been broken, and the parts are only transferring power due to the fact that they are touching . In fact, the only thing even holding the connector to the board is the connection in the bottom middle (between the two lower yellow circles) and it has a crack in it, as well.
Notice, also, the dried flux residue, indicating that this bottom-side soldering was done entirely, or touched up, by hand – and not cleaned afterwards.
The actual metal that conducts the power is actually of the top side of the board, where the connector is mounted, but the fact that the solder that flowed through mounting holes has cracked indicates is was not properly soldered in the first place.
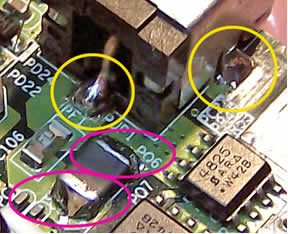
As you can see in the two views below, all solder joints between the connector and the top side copper on the board now look much better. Increasing the size and coverage of the solder joints to the metal sides of the connector will make its mounting to the board physically much stronger as well, and better able to resist any side-to-side or up-and-down forces.
Power connector soldered
Power connector top view
Inside the red circles, you can see that both sides of that part PL1 have been well resoldered.
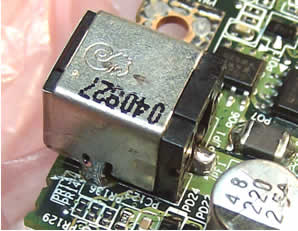
This bottom view of the board after the repair shows good flow of solder through to the bottom side at the time the joints were resoldered.
Connector resoldered bottom view

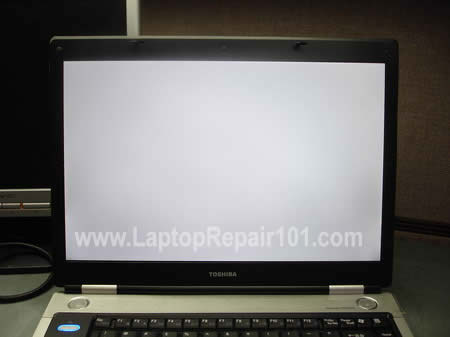
Laptop LCD screen turned completely white


Laptop LCD screen turned completely white

What can you do if the laptop LCD screen turned completely white? From my experience I can tell that this problem may be related to the following:
1. Loose connection between the video cable and the LCD screen.
2. Defective LCD screen.
3. Defective motherboard (I assume the graphics card is integrated into the motherboard).
Laptop screen is white
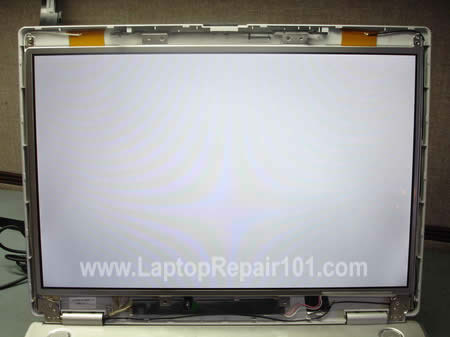
Here’s an example of a laptop with white screen. When you turn on the laptop, it starts but the image on the screen is completely white right from the beginning. In my case it was a Toshiba Satellite M45 laptop but this problem may occur with any other brand.

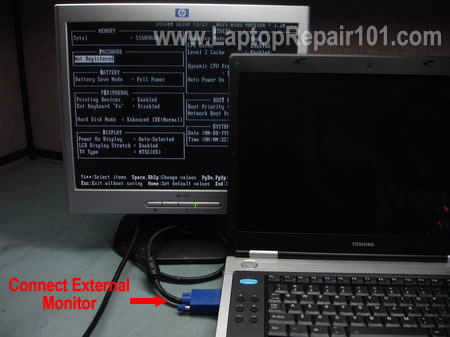
Test laptop with external monitor
Most likely you still can use the laptop with an external monitor. Just connect the monitor to the VGA port on the back or side of your laptop and then switch the video output from internal to external mode.
On Toshiba laptops you can toggle between internal and external screens using Fn+F5 keys. Hold down Fn and press on F5 until you get video on the external monitor.
On IBM laptops use Fn+F7.
On HP laptops use Fn+F4.
It’s possible that you have to use a different key combination on your laptop but you get the idea.
On some laptops, in order to be able to use the external monitor, you have to connect it to the laptop and then restart the laptop so the external monitor is detected by the laptop.
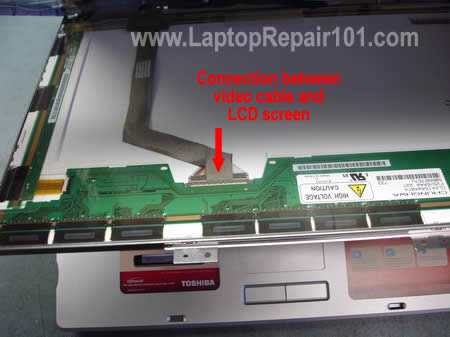
Laptop video cable
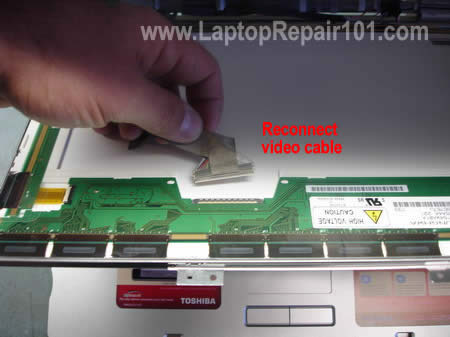
I noticed that in some cases the laptop screen may turn white because of poor connection between the video cable and the LCD screen. If you want to check this connection, you’ll have to take apart the display panel because the connector is located on the back side of the LCD screen.
These laptop service manuals and disassembly instructions may be useful.
Reconnect video cable
I always check the video cable connection first. Reconnecting the video cable may fix your problem.
If reconnecting the video cable doesn’t help, most likely you have a problem either with the LCD screen or with the motherboard.
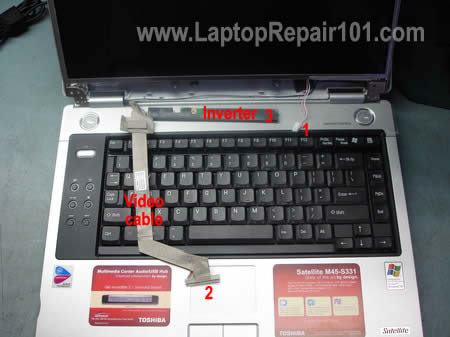
Disconnect LCD screen
The best way to find out witch one is causing the problem is testing the laptop with another working LCD screen. Without this test you’ll have to guess because as I mentioned before this could either bad motherboard or bad LCD screen.
You’ll have to disconnect the video cable from the LCD screen (connector 2) and the inverter board (connectors 3 and 1). After that you connect another working screen and test video.
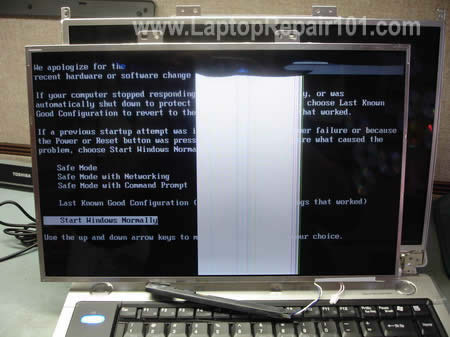
Test laptop with another LCD screen
For this purpose I’m using one of my test LCD screens. My test screen is cracked and because of that you see a wide white band in the center but it still works fine for this test.
The original screen is white but my test screen works normal (except the crack of course) and I can see the image. After this test I can tell that the problem must be related to the screen.
White LCD screen
After I assembled everything back together and connected the original LCD, it’s still white.
CONCLUSION. In my case this problem is related to the LCD screen and it has to be replaced.